Weatherize Your Home for Better Comfort and Lower Bills
You can save a lot of money by spending a week weatherizing your home. With a few tools, some basic handyman skills and a weatherization checklist, you can convert a home that wastes energy into one that’s comparatively airtight and energy efficient.
Tightening up a home has benefits in the cold of winter and the heat of summer. Following are some tips on home weatherization that will help year-round.
Start with windows and doors
In many homes that leak air, windows and doors are the main culprit. In winter, warm air and heat energy escape and cold air finds its way in; in summer, hot outside air gets inside along with heat energy.
It’s not easy to produce efficient heating and cooling if your HVAC system is constantly working to make up for the loss of conditioned air. Plus that sort of overwork over the long term will gradually break down your equipment, necessitating AC or furnace repairs. Take these steps when sealing windows (or hire an experienced contractor to do the work for you):
- With a caulk gun, squeeze caulk around the outside of window casings.
- Apply glazing around the edges of your home’s windowpanes. Scrape off old glazing, clean the glass, then apply new glazing where glass meets the window frame.
- Tightly shut the window and spread rope caulk where movement occurs when the window is opened or closed.
- If your home doesn’t have storm windows, apply plastic window film either inside or outside the window right before the cold season.
As for doors that open to the outside, you should remove and replace worn weatherstripping.
If you can see daylight under the door, install a vinyl or rubber door sweep. The weatherstripping should go on the inside of the doorjamb. Apply caulk to non-moving parts of doors, such as the door casing. With sliding doors, you may have to apply weatherstripping on both the edge of the door and the frame itself to make a tight-enough seal.
Now it’s time for more air sealing
Find some more caulk along with expanding spray foam, and go to work on your home’s exterior. Specifically, look for any spot where utility conduits or plumbing penetrate the outside walls of the home.
Find locations where building materials connect, including just above the foundation. In a lot of cases, leaks in windows and doors are easier to spot from outside than inside. Inspect window frames. Expanding foam can be used to fill in bigger gaps and cracks, with caulk suitable for most other situations.
Most sealant includes detailed instructions right on the container, though it helps to have a magnifying glass handy (especially if you’re older with vision that’s not what it used to be).
Another way to find air leaks is to take a lighted candle or smoke pencil and patrol along your home’s outside envelope. Move the smoke or flame along the wall, placing it close to areas that are more prone to air leaks, including
- doors and windows,
- recessed lighting,
- wall outlets and
- utility penetrations.
When the smoke or flame wavers, you’ve probably found an air leak. Follow the aforementioned instructions for sealing leaks. The bonus when it comes to sealing openings to the outside is that you’re also walling off your house from insects and other small critters.
Other home weatherization steps to take
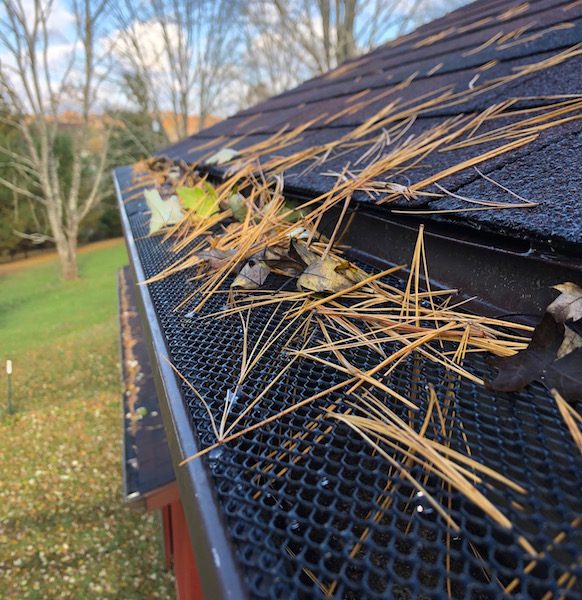
- Inspect the house’s rain gutters, both along the roof edge and at the spot where the water drains downward. If the gutters are compromised, rain and melted snow may seep down into walls or even into your foundation, causing expensive damage. The same will occur if the water isn’t being directed sufficiently far away from the house.
- Check attic insulation. If the insulation on the attic floor doesn’t rise to the top of the floor joists, add some more (though make sure it’s the right kind). In many homes, the attic is the spot where the most heat transfer occurs, both in winter and summer.
A trusted HVAC company that specializes in insulation can advise you on what type of, and how much, insulation to use, what R-value (thermal resistance) to use for your climate, and how to install it (or they will install it for you).
- Seal the attic from your home’s living spaces. Both air and heat energy can move between the attic and below. When this happens, your HVAC equipment must work harder to heat or cool your home. For the attic hatch or door, use weatherstripping and insulation to reduce energy transfer between below and above.
- Inspect your home’s air ducts and seal or tighten loose connections or other issues caused by age, poor design or installation. Make sure ducts that run through unheated or uncooled areas are insulated. You don’t want your conditioned air to lose most of its warmth or coolness before it reaches its destination.
If you take most or all of these actions, you’ll enjoy lower heating and cooling bills, significant energy savings and enhanced home comfort. Nearly all of the above steps will save energy throughout the year.
Don’t forget ventilation
The only potential negative to weatherizing a home is that if the home isn’t properly ventilated, air that’s trapped inside can get stale and even unhealthy. Contact your preferred Cincinnati heating and air conditioning company and ask them to assess your home’s ventilation the next time they visit for scheduled seasonal maintenance.
Or if you’re particularly concerned about indoor air quality, call them for a special service.